ASComm IoT
GE IoT Software Driver Example Application
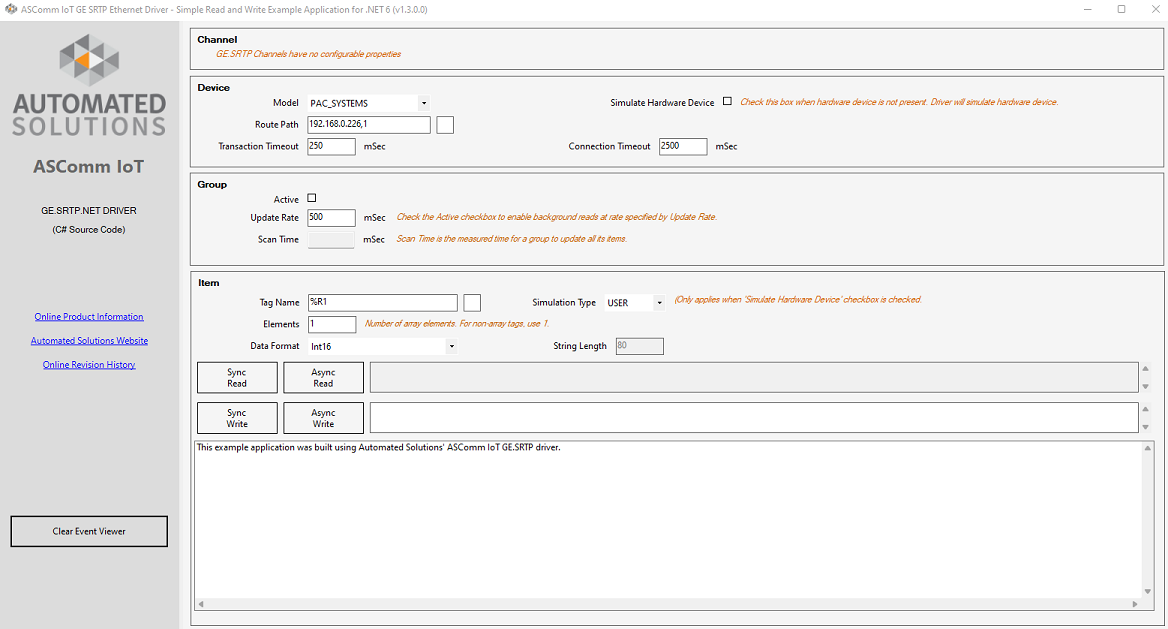
Simple Read and Write
GE IoT Software Driver Code Example
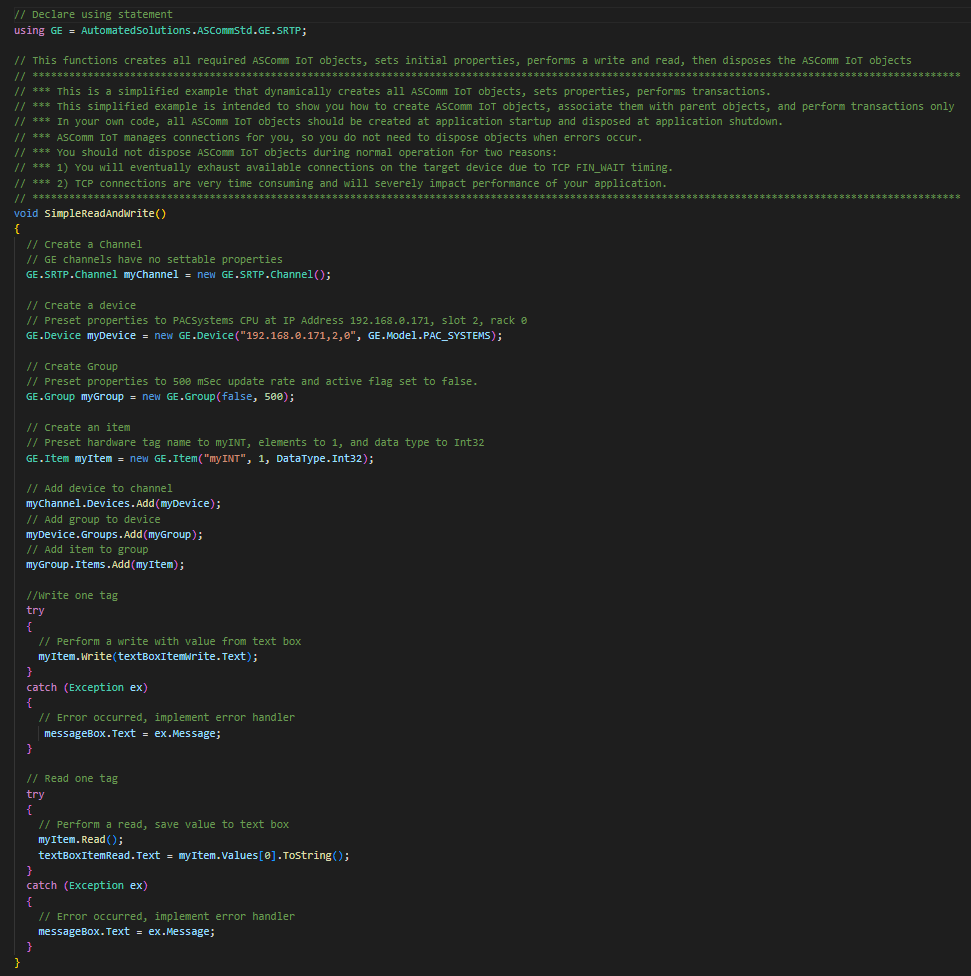
ASComm IoT GE SRTP Ethernet Driver is a communications library that enables your .NET 10/9/8 applications to read and write registers on PACSystems RX3i, RX7i, Rxi, Series 90-30, and VersaMax controllers without PLC program modifications, OPC or third party libraries.
PACSystems symbolic register naming supported.
Use Visual Basic, C#, C++, and ASP.NET to create HMI, SCADA, data logging, and Industrial IoT applications targeting Windows, Linux and Android.
Powerful pre-built example applications with VB and C# source code included in development package.
Runtime-free for qualified applications
Installing a bunny hop (Bhop) plugin on a Counter-Strike 1.1 server is a great way to improve movement flow. Most servers use AMX Mod X, so this guide focuses on that platform. 🛠️ Prerequisites A working CS 1.1 server (Listen or Dedicated). AMX Mod X already installed. The bunnyhop.amxx file (usually found on AlliedModders). 📂 Step 1: Upload the Plugin File Navigate to your server's main directory (usually cstrike). Open the addons/amxmodx/plugins folder. Copy your bunnyhop.amxx file into this folder. 📝 Step 2: Register the Plugin Go back to addons/amxmodx/configs.
Most bhop plugins come with "Cvars" (Console Variables) that allow you to toggle the plugin or adjust speed settings. Open cstrike/addons/amxmodx/config/amxx.cfg.
Do not trust random EXE files. Use the official AMX Mod X forums or GitHub.
To install a Bunny Hop (Bhop) plugin for a Counter-Strike 1.6 server, you typically use the
plugins.ini for correct filenamemeta version/cstrike/addons/amxmodx/logs/Configure the Plugin: Some plugins require configuration through a text file or server console commands. Check the plugin's documentation for specifics.
Upload the .amxx file (e.g., bunnyhop.amxx)